

Adding a New Texture to an Existing Model in TW1
Someone sent me a PM asking me how to add new textures to an existing model, and I'm answering publicly, just in case anyone else wants/needs to know this.
I'm assuming that you already know how to find which DDS format (and how many mipmaps) you need to use for textures, how to make or alter textures in Photoshop or Gimp, and how to save your new textures using the right DDS format and the right number of mipmaps. (If you don't know how to do that, I've answered questions about it before, so you should be able to use the search function on the forum to find that information.)
The appearance of characters in TW1 is controlled using the appearance.2da file. Unbiff the 2DA file, then grab the appearance.2da file and copy it to your Data directory, in a place where it's easy to find; you could make a folder called "Working Files," for example.
You can only look at one appearance.2da at a time, so if you're using Full Combat Rebalance or the Genie Wish Mod or any other mod that uses the appearance.2da file, you'll need to move those elsewhere. Or, if you want the thing you're making to be compatible with those mods, then grab the appearance.2da file I've appended to the bottom of this post; it combines the lines for FCR and for all of my mods, so whatever you make will be compatible with both of those mods. (You'll still need to remove the appearance.2da files for the other mods, though; you want only ONE appearance.2da file in your Data folder -- or any of its subfolders -- at any time.)
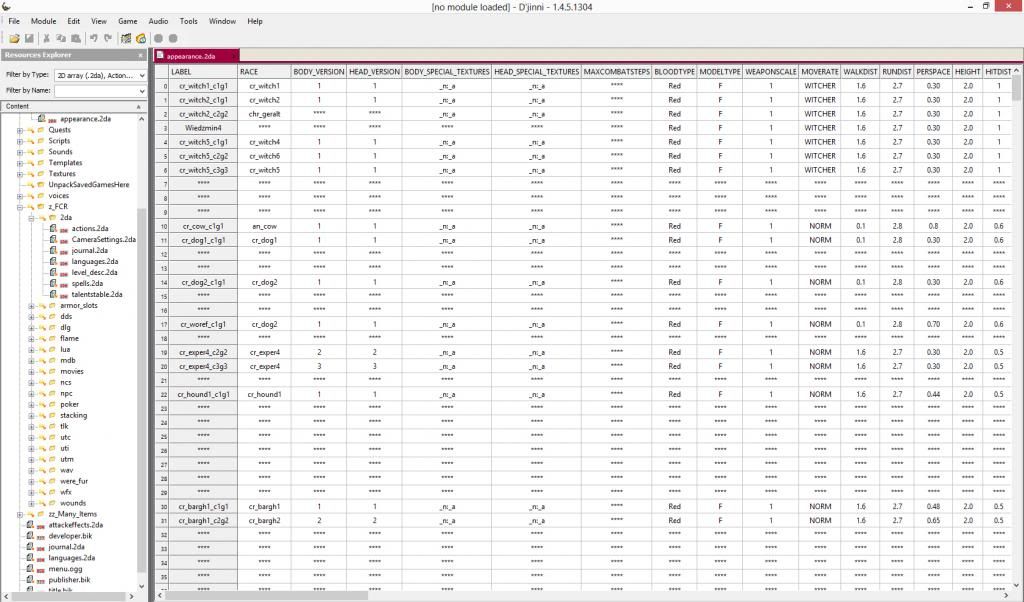
So, if you open the appearance.2da file in Djinni, it looks like this:
Using the Djinni Wiki's List of Models, find the model you want to add a texture for.
I'm going to use making the Genie Wish Mod as an example here, but of course, where I've said "Azar Javed" and "the genie," you'll substitute the names of the models YOU want.
So, looking at the list in the Djinni Wiki tells us that Azar Javed's model is cr_rienc1_c1g1. If you scroll down the appearance.2da , you'll find that on line 464.
Right-click on the appearance.2da , and you'll get a pop-up box that looks like this:
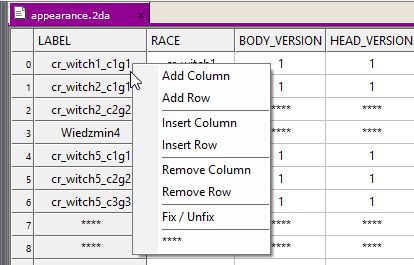
Choose "Unfix," and the first column of the appearance.2da becomes changeable.
Right-click again and choose "Add Row," which will add a row at the very end of the appearance.2da table. Do NOT choose "Insert Row," because that will add a new row wherever your cursor is. The game uses the line number to assign models and textures to characters, and if you insert a row in the middle of the table, you will mess up every character that comes after that row. So use ADD row, and only add new lines to this table at the end.
While you're at the row of the character whose model you want to use, click in the number field at the very beginning of the table; this will highlight the entire row. Hit Ctrl-C to copy that row, then scroll down to the new line you added to the end of the table. Click in the number field at the very beginning of the table in the line for the new row and hit Ctrl-V to copy the line to the new row.
Okay, so now it's time to look at the fields. The RACE field gives you the name of the model, and you usually won't be changing that. (Adding new models is possible, but it's beyond the scope of this particular tutorial.) The BODY_VERSION and HEAD_VERSION fields tell the game which versions of the body and head texture files you want to use with the model for this particular character.
Since there's only one texture file already in the game for the cr_rienc1 model, that means that the next available numbers are simple; I go from cr_rienc1_c1g1 to cr_rienc1_c2g2. So for the genie, I change the numbers for both the BODY_VERSION and HEAD_VERSION fields from 1 to 2.
Then go to the LABEL field and change cr_rienc1_c1g1 to cr_rienc1_c2g2.
Like this:

Save the appearance.2da file. Right-click in the LABEL field, choose "Fix/Unfix" to "fix" the file again, then save the file again. Close the appearance.2da.
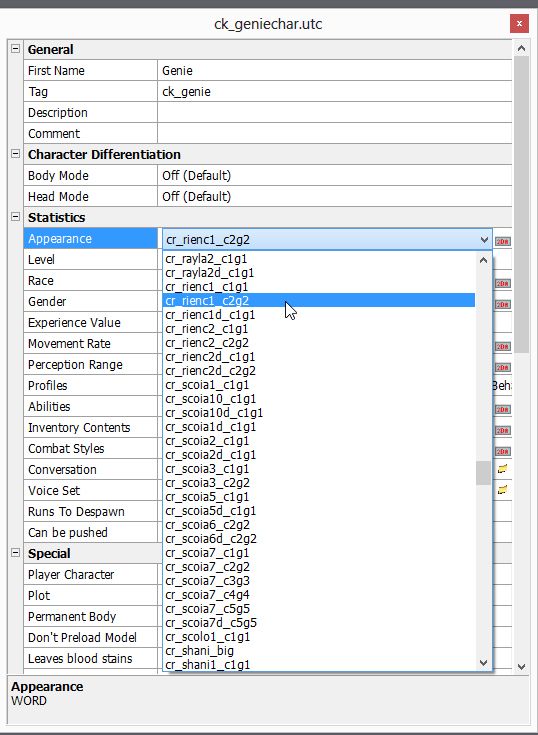
Now go to the character template of the character you wanted a new appearance for. Click on the appearance box, scroll down, and the line you added to the appearance.2da table should now be listed as a possible choice for the character. Click on the new choice to select it, like this:
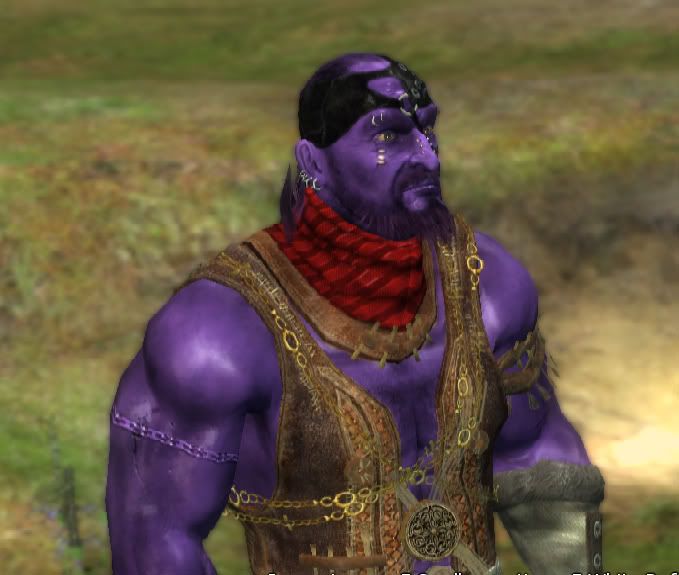
And when we do all of that, it works! Result: One purple genie:
If you were adding a new texture to a model that has more than one texture, then of course you'd use the next number. For example, the "aunt" model has FOUR textures, so you'd use 5 if you were adding a new texture for that model, making your label cr_aunt1_c5g5.
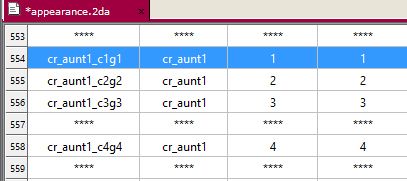
If you want to use an existing texture for the model's head or body and change only one or the other of those textures, you can do that, too, simply by specifying the correct number for the texture in the BODY_VERSION and HEAD_VERSION fields and giving the right numbers in the LABEL field. "G" textures are for the head and "C" textures are for the body, so if we wanted an "aunt" character with the blue headpiece from cr_aunt1_c3g3 but the green dress from cr_aunt1_c1g1, then we'd put 3 in the HEAD_VERSION field, 1 in the BODY_VERSION field, and cr_aunt1_c1g3 in the LABEL field.
I use a LOT of recolors in my "Medical Problems" adventure, and you should feel free to open up that adventure in Djinni, paw through it, and see how everything works.
Best of luck! Hope you make something fabulous for us all to enjoy!
Someone sent me a PM asking me how to add new textures to an existing model, and I'm answering publicly, just in case anyone else wants/needs to know this.
I'm assuming that you already know how to find which DDS format (and how many mipmaps) you need to use for textures, how to make or alter textures in Photoshop or Gimp, and how to save your new textures using the right DDS format and the right number of mipmaps. (If you don't know how to do that, I've answered questions about it before, so you should be able to use the search function on the forum to find that information.)
The appearance of characters in TW1 is controlled using the appearance.2da file. Unbiff the 2DA file, then grab the appearance.2da file and copy it to your Data directory, in a place where it's easy to find; you could make a folder called "Working Files," for example.
You can only look at one appearance.2da at a time, so if you're using Full Combat Rebalance or the Genie Wish Mod or any other mod that uses the appearance.2da file, you'll need to move those elsewhere. Or, if you want the thing you're making to be compatible with those mods, then grab the appearance.2da file I've appended to the bottom of this post; it combines the lines for FCR and for all of my mods, so whatever you make will be compatible with both of those mods. (You'll still need to remove the appearance.2da files for the other mods, though; you want only ONE appearance.2da file in your Data folder -- or any of its subfolders -- at any time.)
So, if you open the appearance.2da file in Djinni, it looks like this:

Using the Djinni Wiki's List of Models, find the model you want to add a texture for.
I'm going to use making the Genie Wish Mod as an example here, but of course, where I've said "Azar Javed" and "the genie," you'll substitute the names of the models YOU want.
So, looking at the list in the Djinni Wiki tells us that Azar Javed's model is cr_rienc1_c1g1. If you scroll down the appearance.2da , you'll find that on line 464.
Right-click on the appearance.2da , and you'll get a pop-up box that looks like this:

Choose "Unfix," and the first column of the appearance.2da becomes changeable.
Right-click again and choose "Add Row," which will add a row at the very end of the appearance.2da table. Do NOT choose "Insert Row," because that will add a new row wherever your cursor is. The game uses the line number to assign models and textures to characters, and if you insert a row in the middle of the table, you will mess up every character that comes after that row. So use ADD row, and only add new lines to this table at the end.
While you're at the row of the character whose model you want to use, click in the number field at the very beginning of the table; this will highlight the entire row. Hit Ctrl-C to copy that row, then scroll down to the new line you added to the end of the table. Click in the number field at the very beginning of the table in the line for the new row and hit Ctrl-V to copy the line to the new row.
Okay, so now it's time to look at the fields. The RACE field gives you the name of the model, and you usually won't be changing that. (Adding new models is possible, but it's beyond the scope of this particular tutorial.) The BODY_VERSION and HEAD_VERSION fields tell the game which versions of the body and head texture files you want to use with the model for this particular character.
Since there's only one texture file already in the game for the cr_rienc1 model, that means that the next available numbers are simple; I go from cr_rienc1_c1g1 to cr_rienc1_c2g2. So for the genie, I change the numbers for both the BODY_VERSION and HEAD_VERSION fields from 1 to 2.
Then go to the LABEL field and change cr_rienc1_c1g1 to cr_rienc1_c2g2.
Like this:

Save the appearance.2da file. Right-click in the LABEL field, choose "Fix/Unfix" to "fix" the file again, then save the file again. Close the appearance.2da.
Now go to the character template of the character you wanted a new appearance for. Click on the appearance box, scroll down, and the line you added to the appearance.2da table should now be listed as a possible choice for the character. Click on the new choice to select it, like this:

And when we do all of that, it works! Result: One purple genie:

If you were adding a new texture to a model that has more than one texture, then of course you'd use the next number. For example, the "aunt" model has FOUR textures, so you'd use 5 if you were adding a new texture for that model, making your label cr_aunt1_c5g5.

If you want to use an existing texture for the model's head or body and change only one or the other of those textures, you can do that, too, simply by specifying the correct number for the texture in the BODY_VERSION and HEAD_VERSION fields and giving the right numbers in the LABEL field. "G" textures are for the head and "C" textures are for the body, so if we wanted an "aunt" character with the blue headpiece from cr_aunt1_c3g3 but the green dress from cr_aunt1_c1g1, then we'd put 3 in the HEAD_VERSION field, 1 in the BODY_VERSION field, and cr_aunt1_c1g3 in the LABEL field.
I use a LOT of recolors in my "Medical Problems" adventure, and you should feel free to open up that adventure in Djinni, paw through it, and see how everything works.
Best of luck! Hope you make something fabulous for us all to enjoy!
")


