How to make your own DLC and add new files to the game some thoughts and a guide.
READ THIS CAREFULLY
DISCLAIMER:
Will it work? Yes.
Is it the right way of doing it? Probably not.
Is this in any way a legitimate and approved method by CDPR? - NO!
This guide will focus on adding a complete new entity to the game without replacing anything.
The entity we use will be a copy of an existing one, the gryphon, with some major changes but
without modifying the original entity, rather making a copy of it and adding it to the game.
It took some time to figure this out and I want to thank all participants that helped with this
and that had as much fun hacking around trying to get this to work.
Special thanks:
@erxv - for having the idea of trying this in the first place to add new entites to his Random Encounters mod
@CAPA14 - for being the texture pro without really knowing what's going on
@marvelmaster - for all the help with the .xml edits and the whole texture.cache stuff and noticing that quickBMS meshes are not the same as Uncooked meshes
@Sarcen - for providing the mod editor (he deserves all the credits for this really, it wouldn't be possible at all without the editor)
@CDPR - for making this the most over complicated thing in history of modding, really cool.
General Tips:
- if you don't know how it works, look at how CDPR did it first, take notice.
- meaning, extract the DLCs, look at their .reddlc files etc. get to know the path / folder structure etc.
- it will all make sense, once you understand how they do it
Prerequisites:
get modkitchen - find it on nexusmods
get sarcens mod editor - latest version 0.11
all files extracted with quickBMS (so you can access .w2ent, .redfur, basically anything that isn't UNCOOKED/UNPACKED by wcc_lite)
all files UNCOOKED with wcc_lite (you will want to use the UNCOOKED .w2meshes instead of the extracted quickBMS .w2meshes)
extract any of the given CDPR DLC with quickBMS you'll need some files later
I used: DLC14
Several folders, this guide uses:
D:\Mods\
D:\ExtractedMeshes\
D:\Cooking\
replace these with your own folders if you need to.
Part 1)
- preparing the DLC -
1. open sarcen's mod editor
2. create a new mod in D:\Mods\
- in this example we created a mod project called: yourdlcname -
3. save the mod in sarcen's mod editor
- you should now have a D:\Mods\yourdlcname\ folder (created by the modeditor)
4. if you haven't already, extract a DLC blob0.bundle with quickBMS
5. find the dlc.reddlc file in your extracted blob0.bundle
6. copy it to your mod project working directory: D:\Mods\yourdlcname\files\dlc\yourdlcname\
- if there's no \files\ folder, create one then make sure it's followed by \dlc\yourdlcname\
7. rename the file to: yourdlcname.reddlc
8. open yourdlcname.reddlc in the mod editor
- now we prepare the .reddlc file to mount our stuff and "add" it to the game -
look at Chunk: CDLCDefinition #1In the properties tab click on -> mounters
- this array holds all chunks that are mounting (adding) files to the game.
- we only need one CR4DefinitonsEntitieTemplatesDLCMounter in this example
clear out the array, leave one: CR4DefinitonsEntitieTemplatesDLCMounternext delete all chunks that are not needed anymore in CDLCDefiniton #1, leave one: CR4DefinitonsEntitieTemplatesDLCMounter Chunk
- don't worry you can add new Chunks and Vars if needed at any time -
open (click) that last remaining CR4DefinitonsEntitieTemplatesDLCMounter chunk in the Chunk Listin the properties tab find var: entitieTemplatesDirectoryPath
- change it to: dlc\yourdlcname\path\to\where\you\want\to\load\the\ents\from
we are going to use: dlc\yourdlcname\data\gryphon
9. save the project
Part 2)
- now we prepare the files we want to add to our DLC -
1. go to -> D:\Mods\
2. open your mods working directory - if you did everything right in Part 1 you should already have: D:\Mods\yourdlcname\files\dlc\yourdlcname\
3. add the folders to your working directory that you just added to the entitieTemplatesDirectoryPath var in the .reddlc file: \data\gryphon
- our full path should now look like this: D:\Mods\yourdlcname\files\dlc\yourdlcname\data\gryphon
- now we add the .w2ent's for our custom entity from our - quickBMS extraction
- you won't find these .w2ent files if you just UNCOOKED the game
4. get the main entity from: characters\npc_entities\monsters\
5. copy and paste: gryphon_lvl1.w2ent to D:\Mods\yourdlcname\files\dlc\yourdlcname\data\gryphon\
6. now open: characters\models\monsters\gryphon\ in your quickBMS extraction
- Explanation about files inside: characters\models\monsters\gryphon\
i_01__gryphon.w2ent = entity with brown feathers mesh
i_02__gryphon.w2ent = entity with normal hair mesh / hairworks .redfur
i_04__gryphon.w2ent = entity with white / blue feathers mesh
t_01__gryphon.w2ent = entity with yellow "light brown" gryphon body mesh
t_02__gryphon.w2ent = entity with dark gryphon body mesh
t_03__gryphon.w2ent = entity with vulcanic (red) gryphon body mesh
7. copy and paste: t_01__gryphon.w2ent, i_01__gryphon.w2ent, i_02__gryphon.w2ent to your mod editors working directory:
D:\Mods\yourdlcname\files\dlc\yourdlcname\data\gryphon\
- we now have the body mesh entity (t_01__gryphon.w2ent), the feather mesh entity (i_01__gryphon.w2ent), the hair / hairworks mesh entity (i_02__gryphon.w2ent) in our working directory -
- gryphon_lvl1.w2ent loads these 3 entites to create a yellow light brown body mesh, with brown feathers and the default hair (all of the 3 default gryphons use the same hair mesh)
8. rename all the files:
10. open your mod project
11. click on OPEN file (not ADD file)
12. navigate to your working directory and open: custom_gryphon_name.w2ent
- now we modify custom_gryphon_name.w2ent to load our custom appearance entites -
13. In the Chunk List click on Chunk CEntityTemplate #1
14. Switch into the Properties tab of CEntityTemplate #1
15. open appearances -> 0 -> includedTemplates
- you will see an array with 3 items that hold the appearances templates that the entity is loading (t_01__gryphon.w2ent, i_01__gryphon.w2ent, i_02__gryphon.w2ent)
change the includedTemplates array accordingly to your dlc path:
now our custom_gryphon_name.w2ent will load these 3 entites instead of the default entites.
16. save your project
Part 3)
- preparing the meshes and textures we wanna use -
- first we extract the .w2meshs using modkitchen -
1. open modkitchen
2. go to -> export a specific file
3. add meshes you wan't to export e.g. (\Uncooked\characters\models\monsters\gryphon\model\t_01__gryphon.w2mesh)
- Explanation about Uncooked meshes in: characters\models\monsters\gryphon\model\
i_01__gryphon.w2mesh = mesh for brown feathers entity
i_02__gryphon.w2mesh = mesh for normal hair / hairworks .redfur entity
i_04__gryphon.w2mesh = mesh for white / blue feathers entity
t_01__gryphon.w2mesh = mesh for yellow brown gryphon entity
t_02__gryphon.w2mesh = mesh for dark gryphon entity
t_03__gryphon.w2mesh = mesh for vulcanic (red) gryphon entity
4: add: i_01__gryphon.w2mesh, i_02__gryphon.w2mesh, t_01__gryphon.w2mesh to the modkitchen export list
5. set your output directory where you want the extracted files: D:\ExtractedMesh\
6. in modkitchen click on export! button
- meshes should now be exported, now prepare the cook -
7. open the directory you extracted the meshes to: D:\ExtractedMesh\characters\models\monsters\gryphon\model
8. copy all files: t_01__gryphon.fbx and t_01__gryphon.xml etc.
9. paste these file where you want to cook the files:
- Explanation: Modkitchen needs to have all files in a subfolder called: \Modded\
- so we create a folder called: D:\Cooking\Modded\
- now it's important to keep your DLC folder structure going:
create a sub-folder in D:\Cooking\Modded called: dlc\yourdlcname\data\gryphon\model\
Part 4)
// ADDING edited textures!
- you can find the original textures used by the individual meshes in the same folder as the meshes in your uncooked files:
\Uncooked\characters\models\monsters\gryphon\model\
t_01__gryphon_d01.png or .tga depending on what you uncooked is the body mesh texture etc.
- edit these textures how you want and how you know to.
// ADDING edited textures!
1. copy and paste the .tga or .png you edited (custom texture name: t_01__customgryphon_d01.tga) you wan't to cook into the same folder as the meshes: D:\Cooking\Modded\dlc\yourdlcname\data\gryphon\model\
- editing the mesh's .xml -
2. open the t_01__gryphon.xml inside: D:\Cooking\Modded\dlc\yourdlcname\data\gryphon\model\
3. inside the t_01__gryphon.xml change the path to your custom diffuse texture accordingly to your dlc path, e.g. dlc\yourdlcname\data\gryphon\model\t_01__customgryphon_d01.xbm
- make sure you add the file ending: .xbm to the diffuse texture path in the xml and not .png or .tga
The path you add should look like this: dlc\yourdlcname\data\gryphon\model\t_01__customgryphon_d01.xbm
- cooking the mesh and the texture, building the mod -
4. open modkitchen
5. go to -> Build a mod
6. name your mod: moddlcmod / doesn't really matter, really.
7. set mod working directory: D:\Cooking\
8. in modkitchen click on the button: Build!
- mod should now be build, now prepare the dlc -
- make sure you grab the texture.cache we just created -
9. go to -> D:\Cooking\Packed\moddlcmod\content\
10. copy texture.cache and paste it in: \YourWitcher3Directory\DLC\yourdlcname\content\bundles\
- now we need the just cooked .xbm and the cooked .w2mesh -
11. go to -> D:\Cooking\cooked\dlc\yourdlcname\data\gryphon\model\
12. copy all files: t_01__customgryphon_d01.xbm, t_01__gryphon.w2mesh, t_01__gryphon.w2mesh.1.buffer etc.
13. paste all files to your mod editors working directory: D:\Mods\yourdlcname\files\dlc\yourdlcname\data\gryphon\model
Part 5)
- adding the custom meshes to the mesh entites -
1. open the mod editor
2. open your mod project (yourdlcname)
3. click on OPEN file
4. navigate to your working directory and open: t_01__custombody_gryphon.w2ent
- the file holds 2 references to the .w2mesh that is attached to this entity
- and that need to be changed in order to load the custom t_01__gryphon.w2mesh
5. In the Chunk List click on Chunk CEntityTemplate #1
6. Switch into the Properties tab of CEntityTemplate #1
7. find the var: flatCompiledData click on the bytes and 3 buttons appear in the modeditor:, click on open
8. a new tab will open, switch to the new tab and find: CMeshComponent#2
9. switch into the Properties tab of CMeshComponent#2
10. find var: mesh and change the path to: dlc\yourdlcname\data\gryphon\model\t_01__gryphon.w2mesh
11. save your project (click save all)
12. close flatCompiledData tab
13. Back to t_01__custombody_gryphon.w2ent
14. Look at: Chunk #3 CMeshComponent #3 it has the 2nd reference to the mesh used:
15. find var: mesh and change the path to: dlc\yourdlcname\data\gryphon\model\t_01__gryphon.w2mesh
16. Save your project.
- Now the same process repeates for the files:
i_01__customfeathers_gryphon.w2ent
i_02__customhairworks_gryphon.w2ent
i_01__customfeathers_gryphon.w2ent also has two references to i_01__gryphon.w2mesh that need to be changed.
i_02__customhairworks_gryphon.w2ent loads the hair.mesh and the .redfur file (which can also be copied and then added to the DLC)
.redfur doesn't need to be cooked like the .w2meshes and can just be copied like the .w2ents (you will only find .redfur in your quickBMS extraction)
Part 6)
1. make sure all files you want to pack are inside your working directory:
D:\Mods\yourdlcname\files\dlc\yourdlcname\data\gryphon
- this is the final step, we know pack all files
2. click Pack and Install
- your "mod" is automatically copied to your \mods\ directory by the mod editor
3. open \YourWitcher3Directory\mods\yourdlcname\content\
- copy: blob0.bundle, buffers.bundle, metadata.store
4. copy and paste all content to \YourWitcher3Directory\DLC\yourdlcname\content\bundles
- you should now have: texture.cache, blob0.bundle, buffers.bundle, metadata.store inside this folder
5. delete \YourWitcher3Directoy\mods\modyourdlcname\
6. done
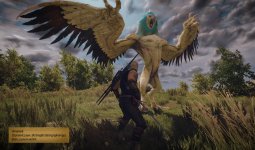
Now you would need to write a small script to spawn that entity, but I don't need to tell ya that it works and that its awesome:

A few final words.
Why this is kinda interesting?
In theory you could add new entites like swords, armor of any type really to the game.
The mod editor is still very basic and doesn't even read all vars correct yet but still already allowed us to add new entity to the game.
The .reddlc files does not only mount new .w2ents files to the game, you can also add .xml and .csv files.
The .xml and .csv can incrementally update existing default .xml's in gameplay\items\ etc.
Meaning that you could maybe add new entities, and update the default .xml's incrementally with the information about the new entites hence adding new objects to lootables etc.
I know that @marvelmaster is currently trying to add a new sword into the game that way and make an item that can be bought from the merchants.
Which would open some awesome opportunites for custom armor and custom weapons and the like.
If you even bothered to read this far my only concerns are that everything worked and maybe just helped you trying to understand the whole process.
:shock2:
READ THIS CAREFULLY
DISCLAIMER:
Will it work? Yes.
Is it the right way of doing it? Probably not.
Is this in any way a legitimate and approved method by CDPR? - NO!
This guide will focus on adding a complete new entity to the game without replacing anything.
The entity we use will be a copy of an existing one, the gryphon, with some major changes but
without modifying the original entity, rather making a copy of it and adding it to the game.
It took some time to figure this out and I want to thank all participants that helped with this
and that had as much fun hacking around trying to get this to work.
Special thanks:
@erxv - for having the idea of trying this in the first place to add new entites to his Random Encounters mod
@CAPA14 - for being the texture pro without really knowing what's going on
@marvelmaster - for all the help with the .xml edits and the whole texture.cache stuff and noticing that quickBMS meshes are not the same as Uncooked meshes
@Sarcen - for providing the mod editor (he deserves all the credits for this really, it wouldn't be possible at all without the editor)
@CDPR - for making this the most over complicated thing in history of modding, really cool.
General Tips:
- if you don't know how it works, look at how CDPR did it first, take notice.
- meaning, extract the DLCs, look at their .reddlc files etc. get to know the path / folder structure etc.
- it will all make sense, once you understand how they do it
Prerequisites:
get modkitchen - find it on nexusmods
get sarcens mod editor - latest version 0.11
all files extracted with quickBMS (so you can access .w2ent, .redfur, basically anything that isn't UNCOOKED/UNPACKED by wcc_lite)
all files UNCOOKED with wcc_lite (you will want to use the UNCOOKED .w2meshes instead of the extracted quickBMS .w2meshes)
extract any of the given CDPR DLC with quickBMS you'll need some files later
I used: DLC14
Several folders, this guide uses:
D:\Mods\
D:\ExtractedMeshes\
D:\Cooking\
replace these with your own folders if you need to.
Part 1)
- preparing the DLC -
1. open sarcen's mod editor
2. create a new mod in D:\Mods\
- in this example we created a mod project called: yourdlcname -
3. save the mod in sarcen's mod editor
- you should now have a D:\Mods\yourdlcname\ folder (created by the modeditor)
4. if you haven't already, extract a DLC blob0.bundle with quickBMS
5. find the dlc.reddlc file in your extracted blob0.bundle
6. copy it to your mod project working directory: D:\Mods\yourdlcname\files\dlc\yourdlcname\
- if there's no \files\ folder, create one then make sure it's followed by \dlc\yourdlcname\
7. rename the file to: yourdlcname.reddlc
8. open yourdlcname.reddlc in the mod editor
- now we prepare the .reddlc file to mount our stuff and "add" it to the game -
look at Chunk: CDLCDefinition #1In the properties tab click on -> mounters
- this array holds all chunks that are mounting (adding) files to the game.
- we only need one CR4DefinitonsEntitieTemplatesDLCMounter in this example
clear out the array, leave one: CR4DefinitonsEntitieTemplatesDLCMounternext delete all chunks that are not needed anymore in CDLCDefiniton #1, leave one: CR4DefinitonsEntitieTemplatesDLCMounter Chunk
- don't worry you can add new Chunks and Vars if needed at any time -
open (click) that last remaining CR4DefinitonsEntitieTemplatesDLCMounter chunk in the Chunk Listin the properties tab find var: entitieTemplatesDirectoryPath
- change it to: dlc\yourdlcname\path\to\where\you\want\to\load\the\ents\from
we are going to use: dlc\yourdlcname\data\gryphon
9. save the project
Part 2)
- now we prepare the files we want to add to our DLC -
1. go to -> D:\Mods\
2. open your mods working directory - if you did everything right in Part 1 you should already have: D:\Mods\yourdlcname\files\dlc\yourdlcname\
3. add the folders to your working directory that you just added to the entitieTemplatesDirectoryPath var in the .reddlc file: \data\gryphon
- our full path should now look like this: D:\Mods\yourdlcname\files\dlc\yourdlcname\data\gryphon
- now we add the .w2ent's for our custom entity from our - quickBMS extraction
- you won't find these .w2ent files if you just UNCOOKED the game
4. get the main entity from: characters\npc_entities\monsters\
5. copy and paste: gryphon_lvl1.w2ent to D:\Mods\yourdlcname\files\dlc\yourdlcname\data\gryphon\
6. now open: characters\models\monsters\gryphon\ in your quickBMS extraction
- Explanation about files inside: characters\models\monsters\gryphon\
i_01__gryphon.w2ent = entity with brown feathers mesh
i_02__gryphon.w2ent = entity with normal hair mesh / hairworks .redfur
i_04__gryphon.w2ent = entity with white / blue feathers mesh
t_01__gryphon.w2ent = entity with yellow "light brown" gryphon body mesh
t_02__gryphon.w2ent = entity with dark gryphon body mesh
t_03__gryphon.w2ent = entity with vulcanic (red) gryphon body mesh
7. copy and paste: t_01__gryphon.w2ent, i_01__gryphon.w2ent, i_02__gryphon.w2ent to your mod editors working directory:
D:\Mods\yourdlcname\files\dlc\yourdlcname\data\gryphon\
- we now have the body mesh entity (t_01__gryphon.w2ent), the feather mesh entity (i_01__gryphon.w2ent), the hair / hairworks mesh entity (i_02__gryphon.w2ent) in our working directory -
- gryphon_lvl1.w2ent loads these 3 entites to create a yellow light brown body mesh, with brown feathers and the default hair (all of the 3 default gryphons use the same hair mesh)
8. rename all the files:
9. open sarcens mod editorgryphon_lvl1.w2ent -> custom_gryphon_name.w2ent
t_01__gryphon.w2ent -> t_01__custombody_gryphon.w2ent
i_01__gryphon.w2ent -> i_01__customfeathers_gryphon.w2ent
i_02__gryphon.w2ent -> i_02__customhairworks_gryphon.w2ent
10. open your mod project
11. click on OPEN file (not ADD file)
12. navigate to your working directory and open: custom_gryphon_name.w2ent
- now we modify custom_gryphon_name.w2ent to load our custom appearance entites -
13. In the Chunk List click on Chunk CEntityTemplate #1
14. Switch into the Properties tab of CEntityTemplate #1
15. open appearances -> 0 -> includedTemplates
- you will see an array with 3 items that hold the appearances templates that the entity is loading (t_01__gryphon.w2ent, i_01__gryphon.w2ent, i_02__gryphon.w2ent)
change the includedTemplates array accordingly to your dlc path:
characters\models\monsters\gryphon\t_01__gryphon.w2ent ->
dlc\yourdlcname\data\gryphon\t_01__custombody_gryphon.w2ent
characters\models\monsters\gryphon\i_01__gryphon.w2ent ->
dlc\yourdlcname\data\gryphon\i_01__customfeathers_gryphon.w2ent
characters\models\monsters\gryphon\i_02__gryphon.w2ent ->
dlc\yourdlcname\data\gryphon\i_02__customhairworks_gryphon.w2ent
now our custom_gryphon_name.w2ent will load these 3 entites instead of the default entites.
16. save your project
Part 3)
- preparing the meshes and textures we wanna use -
- first we extract the .w2meshs using modkitchen -
1. open modkitchen
2. go to -> export a specific file
3. add meshes you wan't to export e.g. (\Uncooked\characters\models\monsters\gryphon\model\t_01__gryphon.w2mesh)
- Explanation about Uncooked meshes in: characters\models\monsters\gryphon\model\
i_01__gryphon.w2mesh = mesh for brown feathers entity
i_02__gryphon.w2mesh = mesh for normal hair / hairworks .redfur entity
i_04__gryphon.w2mesh = mesh for white / blue feathers entity
t_01__gryphon.w2mesh = mesh for yellow brown gryphon entity
t_02__gryphon.w2mesh = mesh for dark gryphon entity
t_03__gryphon.w2mesh = mesh for vulcanic (red) gryphon entity
4: add: i_01__gryphon.w2mesh, i_02__gryphon.w2mesh, t_01__gryphon.w2mesh to the modkitchen export list
5. set your output directory where you want the extracted files: D:\ExtractedMesh\
6. in modkitchen click on export! button
- meshes should now be exported, now prepare the cook -
7. open the directory you extracted the meshes to: D:\ExtractedMesh\characters\models\monsters\gryphon\model
8. copy all files: t_01__gryphon.fbx and t_01__gryphon.xml etc.
9. paste these file where you want to cook the files:
- Explanation: Modkitchen needs to have all files in a subfolder called: \Modded\
- so we create a folder called: D:\Cooking\Modded\
- now it's important to keep your DLC folder structure going:
create a sub-folder in D:\Cooking\Modded called: dlc\yourdlcname\data\gryphon\model\
Part 4)
// ADDING edited textures!
- you can find the original textures used by the individual meshes in the same folder as the meshes in your uncooked files:
\Uncooked\characters\models\monsters\gryphon\model\
t_01__gryphon_d01.png or .tga depending on what you uncooked is the body mesh texture etc.
- edit these textures how you want and how you know to.
// ADDING edited textures!
1. copy and paste the .tga or .png you edited (custom texture name: t_01__customgryphon_d01.tga) you wan't to cook into the same folder as the meshes: D:\Cooking\Modded\dlc\yourdlcname\data\gryphon\model\
- editing the mesh's .xml -
2. open the t_01__gryphon.xml inside: D:\Cooking\Modded\dlc\yourdlcname\data\gryphon\model\
3. inside the t_01__gryphon.xml change the path to your custom diffuse texture accordingly to your dlc path, e.g. dlc\yourdlcname\data\gryphon\model\t_01__customgryphon_d01.xbm
- make sure you add the file ending: .xbm to the diffuse texture path in the xml and not .png or .tga
The path you add should look like this: dlc\yourdlcname\data\gryphon\model\t_01__customgryphon_d01.xbm
- cooking the mesh and the texture, building the mod -
4. open modkitchen
5. go to -> Build a mod
6. name your mod: moddlcmod / doesn't really matter, really.
7. set mod working directory: D:\Cooking\
8. in modkitchen click on the button: Build!
- mod should now be build, now prepare the dlc -
- make sure you grab the texture.cache we just created -
9. go to -> D:\Cooking\Packed\moddlcmod\content\
10. copy texture.cache and paste it in: \YourWitcher3Directory\DLC\yourdlcname\content\bundles\
- now we need the just cooked .xbm and the cooked .w2mesh -
11. go to -> D:\Cooking\cooked\dlc\yourdlcname\data\gryphon\model\
12. copy all files: t_01__customgryphon_d01.xbm, t_01__gryphon.w2mesh, t_01__gryphon.w2mesh.1.buffer etc.
13. paste all files to your mod editors working directory: D:\Mods\yourdlcname\files\dlc\yourdlcname\data\gryphon\model
Part 5)
- adding the custom meshes to the mesh entites -
1. open the mod editor
2. open your mod project (yourdlcname)
3. click on OPEN file
4. navigate to your working directory and open: t_01__custombody_gryphon.w2ent
- the file holds 2 references to the .w2mesh that is attached to this entity
- and that need to be changed in order to load the custom t_01__gryphon.w2mesh
5. In the Chunk List click on Chunk CEntityTemplate #1
6. Switch into the Properties tab of CEntityTemplate #1
7. find the var: flatCompiledData click on the bytes and 3 buttons appear in the modeditor:, click on open
8. a new tab will open, switch to the new tab and find: CMeshComponent#2
9. switch into the Properties tab of CMeshComponent#2
10. find var: mesh and change the path to: dlc\yourdlcname\data\gryphon\model\t_01__gryphon.w2mesh
11. save your project (click save all)
12. close flatCompiledData tab
13. Back to t_01__custombody_gryphon.w2ent
14. Look at: Chunk #3 CMeshComponent #3 it has the 2nd reference to the mesh used:
15. find var: mesh and change the path to: dlc\yourdlcname\data\gryphon\model\t_01__gryphon.w2mesh
16. Save your project.
- Now the same process repeates for the files:
i_01__customfeathers_gryphon.w2ent
i_02__customhairworks_gryphon.w2ent
i_01__customfeathers_gryphon.w2ent also has two references to i_01__gryphon.w2mesh that need to be changed.
i_02__customhairworks_gryphon.w2ent loads the hair.mesh and the .redfur file (which can also be copied and then added to the DLC)
.redfur doesn't need to be cooked like the .w2meshes and can just be copied like the .w2ents (you will only find .redfur in your quickBMS extraction)
Part 6)
1. make sure all files you want to pack are inside your working directory:
D:\Mods\yourdlcname\files\dlc\yourdlcname\data\gryphon
- this is the final step, we know pack all files
2. click Pack and Install
- your "mod" is automatically copied to your \mods\ directory by the mod editor
3. open \YourWitcher3Directory\mods\yourdlcname\content\
- copy: blob0.bundle, buffers.bundle, metadata.store
4. copy and paste all content to \YourWitcher3Directory\DLC\yourdlcname\content\bundles
- you should now have: texture.cache, blob0.bundle, buffers.bundle, metadata.store inside this folder
5. delete \YourWitcher3Directoy\mods\modyourdlcname\
6. done
Now you would need to write a small script to spawn that entity, but I don't need to tell ya that it works and that its awesome:
A few final words.
Why this is kinda interesting?
In theory you could add new entites like swords, armor of any type really to the game.
The mod editor is still very basic and doesn't even read all vars correct yet but still already allowed us to add new entity to the game.
The .reddlc files does not only mount new .w2ents files to the game, you can also add .xml and .csv files.
The .xml and .csv can incrementally update existing default .xml's in gameplay\items\ etc.
Meaning that you could maybe add new entities, and update the default .xml's incrementally with the information about the new entites hence adding new objects to lootables etc.
I know that @marvelmaster is currently trying to add a new sword into the game that way and make an item that can be bought from the merchants.
Which would open some awesome opportunites for custom armor and custom weapons and the like.
If you even bothered to read this far my only concerns are that everything worked and maybe just helped you trying to understand the whole process.
:shock2:
Attachments
-
 XFcSDNF.jpg305.4 KB · Views: 1,412
Last edited:
