Staff member

+


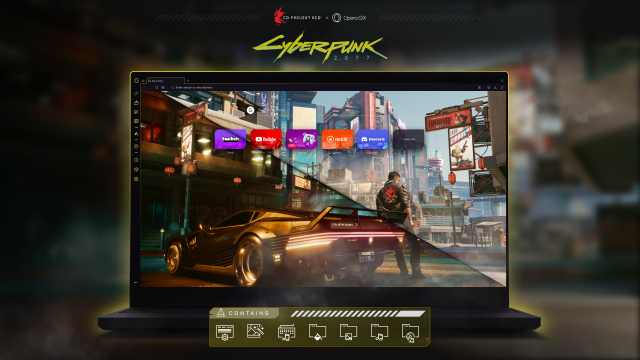
Deck out your Opera GX browser with the Official Cyberpunk 2077 Mod!

Download the Opera GX gamer-centric browser and check out the mod today — it’s free to all Opera GX users! The mod allows you to customize numerous features, such as the animated wallpaper that changes depending on the time of the day, background music and sounds, a special glitch shader, and more!

See the Official Cyberpunk 2077 Mod in action:
 
CyberpunkUltimateEdition_FloppyDiskEdition_1920x1080_EN.png


Are you a fan of sleeper gaming PCs?

Do you yearn for the retrofuturistic experience of the original Cyberpunk?

Do you miss the good ol’ days when game installation was a ritual of its own?

Whichever of the above describes you best, then you’ll love the Floppy Edition of Cyberpunk 2077!

Nowadays, in the era of digital distribution, most PCs come with no drives. However, we also heard many voices from people within our community who love the vintage experience of manual installation. We get it! After all, CD PROJEKT started by distributing games on CDs.

That’s why we’ve decided to explore something you’ve been asking us for since even before the original release — Cyberpunk 2077 on floppy diskettes!

Embrace the ritual of classic game installation using 97,619 3.5” diskettes. Make sure to invite friends over and schedule shifts, as our initial estimations indicate that it might take about 2 months of non-stop diskette-swapping to finish.

Sounds awesome, right? It sure does! Follow the link below to wishlist the Floppy Edition! Be prepared for a truck delivery though!

https://cp2077.ly/FloppyEdition

See you in Night City!
 
Last edited:
Get behind the wheel and ride to your heart’s content — when it comes to getting from A to B, Night City is a driver’s city! From supercars and high-class cruisers to trucks, budget bangers, motorbikes, and even armored vans, the streets of the city are waiting for you to burn some rubber. So turn on the radio and start driving; we’ve picked some routes and areas that are just perfect to cruise through at high speed (with or without unwanted attention) or on a leisurely night drive. Start your engines, chooms!​


  • Rattlesnake Creek — If you’re looking for some off-roading action, the Badlands is where you wanna be. The beauty of the desert is you can swerve from just about any road and speed away freely without a second thought — and we’ve found a decent starting point for your adventure, a route that feels a touch different to the wide-open sands. Rattlesnake Creek is in the southern Badlands, beyond the solar power station. This dried-up riverbed feels custom built for tearing through at speed, and it’ll give you a bit of a challenge as you try to maintain control in the wet sand while navigating past rock formations between the creek’s jagged walls. It’s a good plan to start this route from the Lake Farm — just up the hill to the east (just past the dam). Not far from the Lake Farm travel station, you’ll be able to take a left turn down a steep slope. There you can build up a head of speed before cutting left at the bottom, into the creek itself. Now, try to get to the end and join up with the tarmac without crashing!

  • North Oak Hills — See how the elite of Night City live in North Oak! Their mansions mark the winding, palm-tree-dotted hills, and the roads that take you through this bubble of wealth also make for a pretty fun route to drive. You can start out from Charter Hill at the edge of Westbrook and follow the main road that leads past the Columbarium. As you head up the incline, things start to get greener and greener and you’ll quickly see the iconic North Oak sign come into view. From there, you can cut right and climb further into the hills — swinging behind the sign — or take the left route past the roundabout. Either way you choose, you can enjoy a peppy drive that’ll loop you through North Oak. You’ll take sloping turns and even dart through a couple of short tunnels. If you’re gunning it at high speed, a motorbike is recommended — though it’s still a challenge to stay on the narrow roads (just part of the thrill, right?). But if you like to take things more casual, make sure to slow down and soak in the rewarding views of Night City’s skyline as you go!
  • Newly Opened Highway — Not too long ago, the once-thought “abandoned” highway running from Japantown’s Westbrook to Wellsprings in Heywood was finally finished and opened to all! This route is a fantastic urban tour through Night City, winding past skyscrapers and megabuildings, and offering an up-close look at the difference in architecture as you cruise between districts. Traffic moves at a swift pace here, so you can afford to keep your foot down on straights and as you take long bends. You can even link this route from the North Oak drive, as you can get onto this highway just off the large roundabout on the edge of Wellsprings, not far from the hills (just take a right when you see the construction equipment!). This highway drive is especially cool at night — rain makes it extra moody! But one note of caution: since reopening, the highway has been reported as a Tyger Claws hotspot, so keep your eyes peeled.
  • Kabuki Slums to Corpo Plaza — A longer route, but one that’ll take you through two contrasting lifestyles of Night City, and present some pretty awe-inspiring urban vistas on the way. For this, you’ll ideally want to start on the overpass near Charter Street in Kabuki, Watson district. There’s an elevated road that stretches through Kabuki, heading south. As you descend down the bending overpass, you’ll be instantly met with a wide, mesmerizing view onto Night City’s distant megabuildings, while below you lie the Kabuki slums, with their narrow roads, packed-together apartments, and gang-ridden streets. As the overpass levels out, you’ll be able to bend right, then left, joining up with one of the main roads that stretch to the southern tip of this district. As you speed down this road, it’ll ease right and lead you towards a bridge that’ll take you across to the City Center district. Enjoy a wide straightaway, with corpo skyscrapers dominating your view ahead, before finally coming out close to Corpo Plaza’s majestic roundabout — complete with koi carp fish holograms swimming through the air! Now you’re here, you can donut through the Plaza roundabout to your heart’s content, then take any of the exits and head deeper into Night City.
 
There’s no shortage of things to do in Night City. Just walking or driving through the city streets can lead to diversions aplenty, so if you’re looking for some free-time killers as you immerse yourself in this dense and stimulating megalopolis, here’s some places to go, things to do, and sights to see that’ll give you a buzz no matter what.​
  • Street Races — Burn some rubber and prove you’re the best driver in Night City! The competitive street-racing scene is alive and well in 2077, and while the authorities probably don’t want this sort of thing advertised, you can’t deny that it’s one hell of a thrill to go bumper to bumper and dominate other drivers in this noble, high-octane sport. Not just everybody can get an invite to the starting grid, but we hear that Afterlife bartender, Claire, is looking for a dependable driver. Help her out, and you might just be able to take part in races to earn yourself some pretty cool rewards!

  • Arcade Cabinets — The arcade industry might be a fossil these days — what with entertainment like braindances so easy to get a hold of — but that doesn’t mean you can’t find some bonafide classics to sink some time into! There are still a decent number of functioning arcade machines in town, just hunt around some bars like the El Coyote Cojo in Heywood and you’re bound to find a working Trauma Drama or Roach Race cabinet. These games are a real throwback to the vintage arcade era, and are still as playable and addictive as they ever were. So go hunker down in front of a cabinet and forget about the world around you, if only for a moment. And hey, if you’re skilled enough to get on the leaderboards you might even get a prize or two!


P.S. Word on the street says that there’s an actual playable version of the cult-classic Arasaka Tower arcade shooter out there!! Sources say to hunt around the Biotechnica Flats protein farms in the Badlands if you wanna play it for yourself…​


  • Totentanz — Tucked away inside an abandoned factory in Watson’s NID (Northside Industrial District), Totentanz is a hardcore club frequented by the Maelstrom gang. Its heavy industrial vibe fills you with the need to unleash your pent up aggression; red strobe lighting covers the metal dancefloor as lit-up skulls and Maelstrom iconography add to the air of bloodlust. Heavy, pounding metal pumps from the speakers and there’s plenty of space to let it all out and dance in the black and red aura. When you feel like taking a break, the bar is within spitting distance of the dancefloor, and upstairs you’ll find some slightly chiller surroundings to relax in. And if you want a touch of risk, you can find one hell of a view of the NID by heading past the bar, into the makeshift bathroom, and poking your head (or entire body) out of the window. At nighttime, this is a great vista to enjoy along with a bit of peace and quiet after the hard-hitting beats inside.
  • Mega Ride Rollercoaster — The Pacifica district was supposed to be all about carefree leisure for the wealthy. Clearly, plans didn’t exactly pan out. The district was left half in ruins thanks to jettisoned investment, and now it’s a near no-go zone, with the Voodoo Boys gang staking their claim to almost the entire area. Still, there’s some moments of joy to be found here, and there’s no better example than the Mega Ride! This huge rollercoaster overlooks the coast just behind the Grand Imperial Mall. As you approach it, you can see the sheer scale of this coaster with its steep, winding tracks and even a loop-de-loop. For most visitors, one major drawback is that the Mega Ride seems, well, busted. But good news for you, that means there’s no queue! All it’ll take is a tiny bit of rewiring at a nearby power junction and this hidden gem of an attraction will be all yours. Enjoy the ride!
 
Whether you’re new to Cyberpunk 2077 or a weathered veteran who’s looking for some fresh inspiration, we’ve got just the thing for you! We prepared three varied builds for you to experiment with, and broke them down into easy-to-follow categories so you know where to invest your perk points from the very beginning to the end game, as well as which weapons and cyberware best synergize with them (and where you can find them).

Last, but not least, we’re presenting Hack-&-Slash Netrunner — make sure to check it out in our Build Planner.

Netrunning might seem like a passive playstyle on the surface, but this build introduces some more up-close combat options and options to increase RAM recovery and play around with some of the deadly quickhack combos that arrived as part of Update 2.0.

Perks

Compared to other builds, netrunners have almost all the perks they might need in the Intelligence Tree. From the start of the game, we’ll allocate all of our points here until we reach the Phenom Intelligence level. Our points should be split between the left and middle Intelligence branches. We’ll start by purchasing the Optimization perk to greatly improve our RAM regeneration. Next, we’ll get access to Hack Queue and unlock it together with Data Recycler. After doing so, we should switch our focus back to the middle branch and try unlocking Overclock as soon as possible. While the tree offers a lot of powerful damage bonuses, we should first prioritize anything that gives more RAM regen or regenerates HP. Power Surge and Sublimation are both awesome choices in that regard.

After unlocking the Spillover master perk, we should switch our focus to the Body tree. We’ll be investing purely in the middle Body branch to unlock the Adrenaline Rush perk. This perk provides us with an Overshield and lets us be a bit more aggressive with our Monowire. Once we’re comfortable enough in close quarters, we should definitely put our perk points in both Finisher: Live Wire and Siphon. Finishers allow us to maintain high HP even during Overclock, while Siphon keeps our RAM topped up.

With the base of our build done, we can start investing into the right Intelligence branch, which grants multiple bonuses for smart guns. The Recirculation perk gives us yet another way to regenerate RAM in the middle of combat. Since most useful smart guns for our build just so happen to be SMGs, it might be good to drop some points into the Reflexes tree. Sharpshooter, Practice Makes Perfect, and the Shoot to Chill perks will significantly increase our SMG damage. Shoot to Chill also received an upgrade in Update 2.1 and now grants up to 28% armor penetration, which is a helpful buff for smart weapons that are lacking in that department.

Cyberware

There’s no netrunning without a cyberdeck! While there are a lot of interesting options, the Militech Paraline, aka our starting deck, is actually one of the best. It offers a lot of flexibility and supports both Monowire and smart weapons while taking little cyberware capacity compared to other decks. You can keep upgrading your base deck with crafting materials or keep checking your local ripperdoc’s inventory every few levels. Always try to keep your deck updated to the highest rarity!

To keep our RAM high we should buy Ex-Disk, Mechatronic Core, and RAM Upgrade. Memory Boost is also great but takes much more cyberware capacity. Mechatronic Core can be swapped with this piece at a higher level.

The Ultimate Edition introduced two new pieces of cyberware: Feen-X and Cogito Lattice. They were both designed with netrunners in mind, so we’ll definitely add them to our build.

Netrunners might struggle a bit with survivability, especially early on, so Scar Coalescer and Reflex Tuner can both help us when our HP gets dangerously low. Biomonitor and Second Heart, while more expensive, give even more protection and allow us to be more aggressive with Overclock and Monowire.

Quickhacks

The queue mechanic introduces a completely new layer of quickhack interactions. With that in mind, we’ll focus on two main quickhack combos. Cyberware Malfunction will greatly increase the damage of Short Circuit, allowing us to dispatch even the tankiest enemies. Contagion and Overheat, on the other hand, will explode enemies, giving us one of the strongest crowd control options in the game.

Weapon Glitch, Reboot Optics, and Ping can occupy the remaining slots in our deck to help in some sticky situations and provide much-needed quality of life

Weapons

While quickhack combos usually require us to upload two hacks from our deck, there are exceptions. One of these is Fenrir, an SMG that can be found in Northside Watson during one of the optional quests. This weapon has a chance to apply cyberware malfunction on every hit, improving the damage of our Short Circuit hack. Another weapon-hack combo is available a bit later in the story during the Arasaka Warehouse infiltration. Before you enter the warehouse, check the containers outside to find the Shingen Mark V — a smart SMG with a chance of applying burn. This smart gun will not only grant us RAM on kills but also explode enemies affected by Contagion.

That leaves us with one more weapon slot open. Here, we can either use the Ashura Sniper for an easy elite dispatch or Yinglong Iconic SMG for extra crowd control. With the Submachine Fun perk, running 3 SMGs might not be the worst idea since the perk will automatically refill our reserves on the weapon swap. Just make sure to switch to Monowire from time to time to not run out of ammo!

Late game

Being a netrunner provides endless possibilities! While the Militech Paraline is great for most combat encounters, other cyberdecks are a lot more specialized. Once you’ve built yourself up as a netrunner to be feared, feel free to play around with other options. With our endless RAM reserves, we can utilize ultimate hacks like Suicide or Cyberpsychosis, not to mention explore all of the various quickhack interactions.
 
Whether you’re new to Cyberpunk 2077 or a weathered veteran who’s looking for some fresh inspiration, we’ve got just the thing for you! We prepared three varied builds for you to experiment with, and broke them down into easy-to-follow categories so you know where to invest your perk points from the very beginning to the end game, as well as which weapons and cyberware best synergize with them (and where you can find them).

The second build in this series is Savage Slugger Solo — make sure to check it out in our Build Planner.

Instead of radiation, arm yourself with chrome to become the Cyberpunk 2077 version of the Hulk! This build features a ton of great defense from the Body and Tech trees as well as powerful new blunt finishers to send your enemies flying — maybe straight to the moon.

Perks

In this build, we’ll mainly use blunt weapons and shotguns. The great thing about them is that we don’t need to put much emphasis on damage early on and can instead focus on building up our defense. We’ll start by distributing the starting points equally between the Body and Tech trees, and putting any leftover points into the Reflexes tree. First, heavily invest in the Tech tree until you unlock the License to Chrome perk. Chrome Constitution and the Driver Update perks will help with our cyberware capacity and extra stats granted by our chrome. While we’re at it, investing some points into the left Tech branch might be a good idea. Grenades are especially good in the early game and both Demolitions Surplus and Coming in Hot will help us throw them as often as possible.

After reaching the Phenom level in the Tech tree, we should start properly building our Body tree. We’ll be investing our points here all the way up to level 20 to get ourselves Savage Sling. Pretty much every perk in the right Body branch is going to be a great boost to blunt weapons, with Gorilla Arms being one of the best out there — and always available at every ripperdoc in Night City.

With Savage Sling unlocked, we can be a little bit more flexible with where we would like to invest our points next. The middle Body branch is a great choice because it can make us truly unkillable. The right Branch will widen our arsenal and greatly buff our shotguns and LMGs. Allocating points into Reflexes, on the other hand, can help us with positioning ourselves perfectly for some strong Quakes, not to mention it’ll increase our speed.

Cyberware

A proper tank needs a solid skeleton, so we should make sure all of our cyberware slots in this category are always occupied. Bionic Joints are a great early armor boost. We can swap them out with Dense Marrow once we start maining our melee weapons. Universal Booster and Scar Coalescer both provide some extra safety, although once we get to a high Tech level, we can swap Scar Coalescer out for Para Bellum since we’re unlikely to fall under 50% HP. The Tech tree also gives us the ability to equip Cellular Adapter — an 8 CC (cyberware capacity) integumentary cyberware that provides a huge amount of armor on top of other bonuses.

When it comes to offensive pieces, we should snatch both Adrenaline Booster and Microrotors, especially if we swap to a hammer or a baseball bat. Blunt weapons might deal a great amount of damage per hit, but they can feel a little bit slow without extra investment.

Last but not least, you should give Fortified Ankles a try. They might be less intuitive than the standard double jump, but offer even greater height and armor, which will help us land some powerful Quakes.

Weapons

Before we start investing into blunt weapons, we should be on the lookout for the most powerful shotgun we can find. Luckily for us, Rebecca's weapon, Guts, is still out there in Corpo Plaza, which can be accessed immediately after starting Act 1. This beast of a shotgun should carry us for the majority of the game.

Some of the most powerful blunt weapons can be looted during story missions, so we don’t need to go to any specific location to find them. Finger’s Cane can be looted in Finger’s Clinic and the Sasquatch Hammer drops from, you guessed it, Sasquatch. Those weapons are the most powerful tools for Wrecking Ball and Quake respectively; however, if you find Sasquatch’s Hammer movement speed penalty annoying, you can always swap it for a standard hammer. Don’t get too feisty when exploring the Animals’ club during the “Beat on the Brat” mission and you’ll get access to the Animals’ vendor, who always has some nice hammers in stock and can even sell you crafting specs for them.

Late game

So far, our build focused on close-range weapons, but our perk investments open up some very competitive alternatives. The Ticking Time Bomb master perk can be combined with either Berserk or a Sandevistan, the Shock-N-Awe cyberware, and Painducer to transform us into a walking power plant. Combining everything together makes it possible to explode all nearby enemies with powerful EMP blasts. If anyone survives this deadly combination, you can finish them off with Savage Sling and send them flying further than your Kiroshis can see.
 
Night City is a megapolis unlike any other. It’s split into six main districts and each one feels alive with its own soul and style. From architecture and art to layout, people, places, and more, just walking through the city or taking the NCART sky metro will give you plenty to see. If you’re a photography lover, you might feel a touch overwhelmed. Really, everything can be a killer shot in Night City, so let’s help you point your lens (or Kiroshis) in the right direction. Here are some cool places you can go and enjoy being a cyber shutterbug, including some must-see spots and a couple of hidden gems. Time to go full Photo Mode!​
  • Jig-Jig Street — For this spot, you’ll wanna wait until night time and prepare yourself to dive into Night City’s sordid side. Jig-Jig Street is the city’s red light district and it can be found nestled in Westbrook’s Japantown. It’s a concentrated area of glowing neons filled with sex shops, joytoy sex workers, street dealers, and taboo-testing tourists drawn in by the promise of a good time. Here you’ll find plenty of angles to capture Night City’s neon-drenched aesthetic as you explore the street-side bars and food stalls, and the looming skyscrapers above also add some moody architecture to the street-level smut. And once you’ve had your fill of Jig-Jig street’s allures, hop on over to the Cherry Blossom Market across the street. There you’ll find more traditionally aesthetic sites to snap, including the beautiful pink cherry blossom tree holograms, a wildly gargantuan statue, and the eponymous lantern-lit, glass-covered street market!

  • Rocky Ridge & the Surrounding Deserts — Take a break from the city and enjoy some quiet time in the desert. It’s easy to get lost in the Badlands, so we definitely encourage you to start your desert-photography journey at a landmark that at least resembles civilization. The abandoned town of Rocky Ridge sets the mood for some thought-provoking shots. Urban exploration like this can yield some spectacular results, especially when you use the contrast of day and night time to really tell the story of this once-thriving roadside locale. And once you’re ready to head out into open ground you’ll find plenty of distinctive rock formations and hints of old life dotted throughout the sandy plains just waiting to be captured. Spend some time shooting the sprawling turbines of the Wind Farms, find the perfect landscape shot of Night City’s lights far, far in the distance, and challenge your composition skills as you kick up dust amidst the uninterrupted stretches of sand. The Badlands is a great canvas to take some unique photographs in a setting overrun by unforgiving nature. It opens a whole new world of photography compared to the one available in the dense urban jungle of the city proper.
  • Dogtown — Okay, it might be cheating to add an entire area like this to the list, but hear us out: Dogtown is a city within a city, totally unlike the rest of NC, and there are so many places to shoot that it only makes sense to wrap them all up into one package. Sure, Dogtown’s not for the faint of heart. It’s a place for photographers who enjoy being in the middle of the action and those who want to document what raw life looks like in Night City’s most dangerous district. You can’t even enter the place without an in, and once you’re inside its massive border walls you’re in a free-for-all. Dogtown, originally part of Pacifica, is ruled by a militia. Its crumbling streets make for an impressive canvas though, and so do its eye-catching buildings. The iconic glass pyramid of the Heavy Hearts club always makes for a centerpiece of a landscape shot, then there’s the wrecked luxury of Luxor Heights, the imposing Black Sapphire, the stadium (and the seedy black market within), the slums of Longshore Stacks and much, much more. From panoramic shots of the crumbling skyline to gritty street photography — and even some risky portraits of heavily armed Barghest troops — this is the perfect area to take shots you simply can’t get anywhere else in Night City.
  • Reconciliation Park — Slow down and indulge in some nature. Reconciliation Park is a slice of tranquility hidden away in Heywood, right under the nose of Corpo Plaza. Unlike the glass, metal, and concrete found above in the megalopolis’ manic rush, the park is lush, green, and relaxing. Tall trees line its footpaths and wooden bridges guide you across the park’s lake — giving you a great naturalistic backdrop, especially when the sun’s shining. And besides the natural elements themselves, you can also practice some candid photography and indulge in some people-watching. Plenty of folk flock to the park as they seek to catch a break from the urban sprawl, so take a slow walk around and shoot to your heart’s content. After a while, you might feel like you’ve left Night City entirely!
 
Planning a trip to Night City? Don’t worry, it’s not all guns, cyberpsychosis, and corporate sleaze — there are plenty of fun things to see and do in the City of Dreams beyond all the stuff you see in the headlines. So join us as we take you through a whistle-stop tour of different places, activities, and sights to behold in Night City, perfect if you’re just visiting for a short time or planning to stick around for the long haul!​


Best Places to Eat & Drink

If you’re looking for quality food and artisanal cuisine, the dark future of 2077 isn’t exactly ripe with it. Many Night Citizens get their grub from street-side SCSMs (vending machines to me and you), with food and drinks packaged in gaudy plastic. But eating isn’t the most important part of the experience, right? When you visit a new town, you wanna find the eateries and dives with the best atmosphere, the coolest style, or that “something special” you’ll remember for life. So here’s five must-visit locales — whether you wanna drown your sorrows, have a quick bite, or soak up the Night City vibes for yourself. Bon appetit!​
  • El Coyote Cojo — One of the main draws of this bar, located in the Glen, Heywood, is its owner — the beloved Mama Welles. Known and respected throughout the district, her bar also benefits from her reputation. The welcoming spirit of the place is its strength; with an open ground floor and a booth-laden mezzanine where you can enjoy a cerveza and a burger under the buzz and glow of tacky neon signs, El Coyote Cojo wears a colorful and tough facade — it’s deep in Valentino turf, after all. But try to cause any trouble and you’ll feel the wrath of Mama Welles for yourself. And if you need someone to lend an ear, gentle-giant Pepe the bartender is always on hand, with a shot of tequila ready and waiting, of course!

  • Afterlife — A legendary spot for legendary mercs, the Afterlife is one of the city’s most unique bars. It was originally a mortuary, and was converted way back in 2020. Over the years it’s gone by different names — such as “The Crypt” and “Hades” — and now as “Afterlife” it’s the place to be for gig hunters looking for street cred. If you manage to gain entry to this underground bar, located in Watson, be sure to browse the iconic selection of drinks. The macabre menu features cocktails named after edgerunners who bit the dust in spectacular fashion. Friendly barkeep Claire will fill you in — and while you raise a glass, keep an eye out for some truly iconic fixers from Night City’s underground.
  • Dark Matter — If you’re looking for something elite, exclusive, and oh-so-corpo, Dark Matter is the club for you. Located in Japantown, Westbrook, this suave setting regularly plays host to high-profile celebrities and pop megastars. The lounge is dripping in style, with gold-colored booths providing a comfortable place to chill with a drink, a central stage in the center of the room, and a balcony offering a preem view of Night City’s skyline. But the true highlight is the terrace on the 42nd floor. Up here, more golden booths await, flanked by plants and a large, decadent bar — all setting the mood for some priceless panoramic views of Night City, including a direct line of sight to the affluent hills of North Oak. If you have the eddies (and the connections to actually get inside) Dark Matter is a prime spot to throw back some drinks and enjoy the majesty of the city from high in the sky.

  • Red Dirt — Prefer the grungy rock scene over the elegant corpo pizzazz? Then head on over to Arroyo, Santo Domingo, and check out Red Dirt. This bar is of some historical significance if you’re a chrome-rock fan — it’s where Johnny Silverhand’s band, Samurai, played their first gig back in the early 2000s! Today, Red Dirt is a great place to take in the booze-soaked atmosphere that permeates the local music scene. The stage is ready and waiting for a show, while loud rock blasts from the speakers. It’s far from the usual swanky bars of the City Center, with posters and flyers for gigs long-gone plastered to the walls, and a deep red neon sign outside leaving setting the tone before you step inside. Here, as you sip some budget beer, you can really feel like a blue-collar Night City native.
 
Experience heart-pounding action in Night City you know and love!


We're thrilled to announce another collaboration with Go On Board: Cyberpunk 2077 — The Board Game! It's a unique tabletop adaptation focused on immersive, fast-paced gameplay.

Check out the preview page of the crowdfunding campaign, and Follow to it be notified about updates and the launch.

To make sure you don't miss anything, follow Go On Board on Facebook, Instagram and X (Twitter).


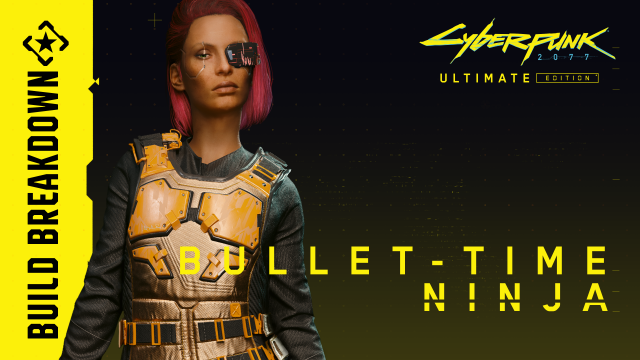
Whether you’re new to Cyberpunk 2077 or a weathered veteran who’s looking for some fresh inspiration, we’ve got just the thing for you! We prepared three varied builds for you to experiment with, and broke them down into easy-to-follow categories so you know where to invest your perk points from the very beginning to the end game, as well as which weapons and cyberware best synergize with them (and where you can find them).

Our first build is Bullet-Time Ninja — make sure to check it out in our Build Planner.

This build is perfect for living out your Edgerunner fantasy by taking full advantage of the Sandevistan and getting the most out of this iconic piece of cyberware. To top it off, we’ll make use of heavy time dilation to get as much as possible out of the DPS of some great melee weapons.

Perks

This build focuses mainly on the Reflexes and Technical Ability trees, so make sure to invest maximum points in both during character creation. Any extra points can be allocated to the Body tree for some extra survivability at the start of the game.

At the beginning of the game, stick to investing points in the Reflexes tree — our most immediate goal is to unlock the Dash perk, which is perfect for closing the distance between enemies, and will help speed up our open-world exploration. At the pro level, it gives us access to the Blade branch, where we’ll want to invest in the Lead and Steel perk, followed by Bullet Deflect.

Once you acquire your first Sandevistan, invest in the Bullet Time perk. We want to keep allocating points into the Reflexes tree until we unlock melee finishers with the Bladerunner perk.

Once we get access to blade finishers, we can start allocating points into Tech. This will further improve our survivability, but what’s more important, it’ll grant us more cyberware capacity. The most important perks in this tree are Cyborg, Extended Warranty, and obviously — Edgerunner.

We can be a little bit more flexible with our points after getting the Edgerunner perk. Since we already have a lot of points allocated to Reflexes, we can get the master-level Slaughterhouse perk and Air Dash. To spice up our gameplay, we can unlock perks that will improve our ranged options. This all comes down to weapon type preference, but since our Reflexes are already at a high level, we’d suggest giving the left branch a try to greatly buff SMGs and Assault Rifles.

Cyberware

Before we lay our hands on a Sandevistan, we need to improve our survivability. Since this build involves taking on most enemies up close, we should definitely buy Carapace and ProxiShield. If you still feel like you’re taking too much damage, either Bionic Joints or Scar Coalescer are great additions. However, pay attention to your cyberware capacity, as you want to make sure you have enough space to install Dense Marrow and Adrenaline Booster, as these two are an absolute must for any melee build.

Last but not least, we can purchase our Sandevistan. The Dynalar Sandevistan will carry us through most of the game, but it will eventually need to be replaced with Apogee.

Weapons

Since this build puts a heavy emphasis on blades, it would probably be a good idea to get one! Luckily, some of the most powerful katanas are available throughout the main story. Be sure to keep your eyes open, though, as they can be easy to miss! During “The Heist”, take a deep breath and search Yorinobu’s penthouse before trying to exit the building. There are three powerful Iconic weapons here: the Satori Katana, Nehan Kaiken, and Kongou Pistol. To get the Satori, you’ll need to go to the roof and search the AV. The Satori and Nehan in tandem provide strong health regeneration, which will allow us to main our katana without the need to pull out a ranged weapon. Both the Satori and Nehan will take a spot in our inventory all the way until we get access to Blade finishers.

To keep both the Satori and Nehan at a proper power level, make sure to dismantle any weapon instead of selling it. The same goes for most clothing. If the sell price isn’t that high, then we should always default to making Crafting Components — we’ll need a lot of them for weapon upgrades.

Once Blade finishers are available to us, we can be a little bit more flexible with our weapon choices. Errata is a very powerful Thermal Katana available in the “Automatic Love” story mission. After entering the Scavengers hideout, make sure to watch for a furnace. It will be in one of the last rooms before your objective. The Errata is hidden there. This blade combos extremely well with the Psalm 11:6 assault rifle available in one of the Watson gang outposts.

With the “Automatic Love” mission done, we should probably spend some time in the open world to level up and gather some funds for cyberware. When doing so, try sticking to Kabuki. Completing all of Wakako’s gigs will reward you with the strongest Katana in the game — Byakko.

Late Game

While it might take some time, you should definitely establish your position as Night City’s resident cyberpsycho by helping Regina Jones round up all of the others. She’ll reward you with Axolotl cyberware. Combined with the Apogee Sandevistan, it will grant you almost infinite Time Dilation. This can be pushed to the extreme thanks to Phantom Liberty. Siding with So Mi will give you access to the Quantum Tuner, which not only decreases the cooldown of all your cyberware but also stores additional Sandevistan charges.
 
Last edited:


Eager to try out Cyberpunk 2077? We've gathered answers to the most important questions you might have in regards to the free trial in the FAQ below:

What platforms is the trial available on?

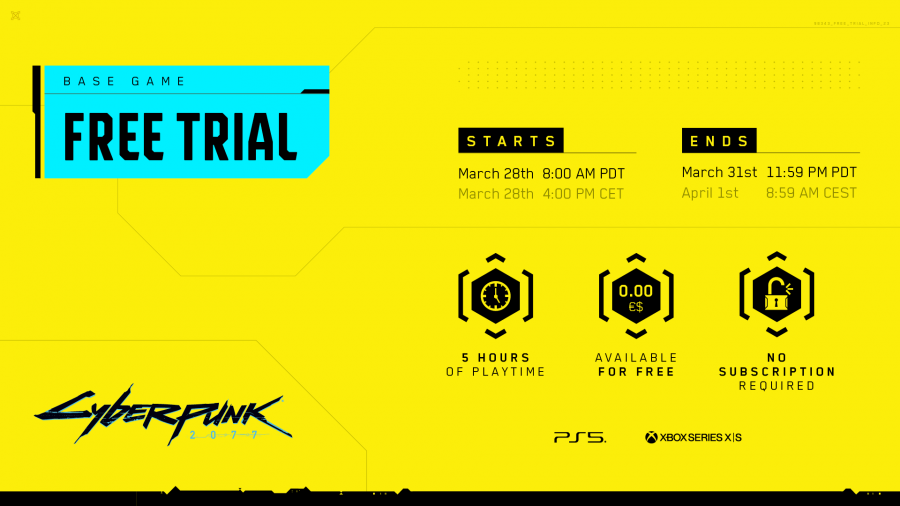
The trial is available on current-gen consoles: PlayStation 5 and Xbox Series X|S.

When exactly will the trial be available and when will it end?

The trial starts on Thursday, March 28th at 4 PM CET (8 AM PDT) and ends on Monday, April 1st at 8:59 AM CEST (March 31st, 11:59 PM PDT).

How long can I play?

You can play for 5 hours during the trial's availability.

Can I play the trial multiple times?

You can only play the trial once with your account. Once 5 hours of gameplay pass, the trial will end and can't be unlocked again.

If I buy the game later, can I keep playing from where I finished my trial, or do I need to start over?

Yes, your trial save progress will carry over to the full game if you purchase it later.

I own the base game, can I try Phantom Liberty?

The trial is available for the Cyberpunk 2077 base game only.

How much space do I need to install the trial?

The trial requires a download of the full game, which is around 99.3 GB on PlayStation 5 and around 103 GB on Xbox Series X|S.

I share my console — can both of us play the trial on the same machine?

As long as you have seperate user accounts, you can play the trial on the same console.

Cyberpunk 2077 is not available in my region. Can I still play the trial?

The trial is only available in the same regions that Cyberpunk 2077 is currently available in.

Is any subscription required to play the trial?

The trial is available for free to all Xbox Series X|S and PlayStation 5 owners and no subscription is required. The only exception is in Germany, where PlayStation 5 owners who do not have a PlayStation®Plus subscription must pay a small, non-refundable fee of €0.15 due to SIE policy.

Will there be a trial for PC users?

No. Due to technical reasons, we are not able to provide the trial for PCs in the same way as for consoles.


Patch 2.12 for Cyberpunk 2077 and Phantom Liberty is being rolled out on PC, PlayStation 5 and Xbox Series X|S. It focuses on main issues experienced by players after Patch 2.11, such as key bindings.

Check out the list of changes below for details:

PC-specific
  • It will now be possible to properly rebind the Radioport and dropping bodies to a different key on AZERTY keyboards. Switching quest objectives will now be assigned to the T key on all keyboards.
  • Fixed an issue where trying to bind the T key to actions in Exploration & Combat resulted in a "Binding Failed" error.
  • Together with Intel we fixed the stuttering issue that occurred while the "Prioritize P-Cores" option was enabled.
  • Together with Razer we fixed a crash that occurred when using Razer Chroma enabled devices.
  • Fixed an issue where NPC hair could appear extremely bright inside vehicles when Ray Tracing is enabled.
  • Fixed a crash that occurred on Steam Deck when playing with Ray Tracing enabled.
Xbox-specific
  • Addressed an issue where the game could enter an infinite loading state, hang up or crash on Xbox when using some saves.
All Platforms
  • Fixed an issue causing the inability to access the menu, inventory, stash, holocalls and fast travel.
  • Updated the description of the Sonic Shock quickhack so that it properly reflects the changes made to its behavior in 2.1.
  • Improved visibility of the controller cursor in menus and when using computers or keypads. This change will primarily help Steam Deck users, but will also benefit consoles and PC when using a controller.
  • New Dawn Fades - Fixed an issue where it wasn't possible to open the phone to read the notification from the Automated Delivery System.
  • I Can See Clearly Now - Lowered the Body attribute check required to move the dumpster.
  • I Walk the Line - Sasquatch's jump attack will now properly register as a hit and deal damage.
  • Riders on the Storm - Enemy cars in the chase sequence will now shoot at Panam's van.
  • Nocturne Op55N1- Fixed an issue where, after choosing to call Reed, the conversation sometimes wouldn't trigger, blocking progression.
  • Sonic Shock will now be properly categorized as a Covert quickhack.
  • Fixed instances where groups of immortal enemies could appear across Night City.
  • Fixed an issue where some elements on the perk screen wouldn't change after switching to Colorblind Mode.
  • BioDyne Berserk will now properly have increased Crit Chance from its Reflexes Attunement.


Curious about the behind-the-scenes magic of capturing the voices of Night City's formidable women? Look no further!

Prepare yourselves for an upcoming special episode of REDstreams, featuring none other than Alix Wilton Regan, the voice behind Alt Cunningham, and Jane Perry, the iconic Rogue! 🔥

Save the date and join us on Wednesday, February 7th at 6 PM CET on
— hosted as always by our Senior Community Managers: Amelia Kołat and Alicja Kozera!

See you soon🎬


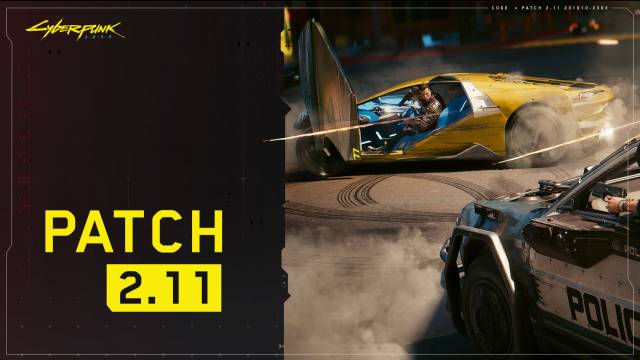
Patch 2.11 for Cyberpunk 2077 and Phantom Liberty is being rolled out on PC, PlayStation 5 and Xbox Series X|S. In this update we focused on fixing the most common issues encountered by players, including Finisher animations, and added a little something for Rayfield enthusiasts!

For details, check out the list of changes below.

Gameplay
  • Melee Finishers will now work properly.
  • Fixed an issue where health items could become unequipped from the quick access slot after using consumables.
  • It will now be possible to properly switch Z and W keybinds for AZERTY keyboards.
  • When using the Classic control scheme, performing dashes will no longer result in crouching.
  • Fixed an issue where it was still required to use the F key (default) to interact even if bound to a different key.
  • Binding the right mouse button to an action different than aiming will no longer result in aiming and the new action occurring simultaneously.
  • Axolotl cyberware will now also reduce cooldown when neutralizing an enemy non-lethally.
  • The Iconic Contagion quickhack will now properly cause an explosion when combined with the Overheat quickhack.
  • Added Psalm 11:6 and Buzzsaw crafting specs for players who completed the required activites to acquire them but they didn't drop.
  • Fixed an issue preventing players from upgrading items to Tier 5++ on Xbox.
  • Skeleton cyberware will no longer get downgraded after acquiring level 3 of the License to Chrome perk.
  • Skill Shards for skills that are already maxed out will no longer drop.
  • The RAM cost for the Cyberpsychosis quickhack will now properly decrease after applying Cyberware Malfunction or an EMP effect.
  • Killing NPCs who are drunk or using a braindance will now properly trigger the police system.
  • Fixed an issue where RAM Recoup cyberware was restoring less RAM than indicated by its description.
  • Fixed an issue where fists would not have a chance to apply Bleeding after reaching level 20 in the Solo skill.
  • Fixed the description for Biomonitor cyberware so it properly states that it heals you when health drops below 50% rather than 35%.
  • It will now be possible to activate Sandevistan cyberware during holocalls if in combat.
  • Fixed an issue where it was possible to get killed by a quickhack while Berserk is active, despite its feature ensuring that health cannot drop below 25%.
  • Cyberware Capacity will now be capped at 450. Cyberware exceeding the limit will be unequipped.
  • Fixed an issue that could cause loot to float in the air as well as reappear in the same spot after picking it up.
Quests & Open World
  • Adjusted car chases so that they're not too frequent and don't overlap.
  • Fixed an issue where vehicles purchased on the Autofixer website weren't added to the owned vehicles list even though money was spent.
  • Made it possible to obtain the BFC 9000 Iconic weapon for players who missed the crashed AV in Rancho Coronado.
  • Fixed an issue where the animation of inspecting the NCART City Pass could be triggered inside an elevator, causing V to fall through it.
  • Fixed an issue where the message from NCART Customer Support that unlocks the metro wouldn't arrive, even if the requirements were met.
  • Fixed some instances where Gigs could remain stuck as incomplete in the Journal without any objectives.
  • A Day In The Life - Fixed an issue where Darrell Zhou would instantly die after approaching the quest marker and speaking to him. Please note that the fix is not retroactive, meaning that you need to load a save prior to speaking to Darrell to be able to complete the quest.
  • Belly of the Beast - Fixed an issue where it wasn't possible to exit the Basilisk after entering the tunnel.
  • Cyberpsycho Sighting: On Deaf Ears - Fixed an issue where it wasn't possible to collect the information required to progress because the shard wasn't present in the area.
  • Don't Lose Your Mind - Fixed an issue where, after choosing to merge the Delamains, it wasn't possible to progress past the "Approach the car" objective because the cab didn't spawn.
  • Down on the Street - Fixed an issue where Takemura wasn't present when arriving at Wakako's pachinko parlor.
  • Gig: Bring Me the Head of Gustavo Orta - Fixed an issue where Gustavo would immediately become hostile after entering his office.
  • Gig: Bring Me the Head of Gustavo Orta - Fixed an issue where the guards would immediately attack the player after picking the peaceful Street Kid dialogue option.
  • I Really Want to Stay at Your House - Fixed an issue where it wasn't possible to sleep in V's apartment bed while the quest was active.
  • Psycho Killer - Improved the reward for neutralizing all Cyberpsychos. Players that already claimed the reward can visit Regina and collect the new reward from the weapon crate.
  • Reported Crime: Dredged Up - Fixed an issue where the trail that must be scanned to progress could be missing.
  • Spellbound - Fixed an issue when the discounted price for the Spellbook could be higher than the full price.
Phantom Liberty-specific
  • Black Steel In The Hour of Chaos - Fixed an issue where there was no objective in the Journal entry because the objective to meet Reed at the abandoned hotel wouldn't appear.
  • Black Steel In The Hour of Chaos - Fixed an issue where there were no dialogue options that would progress the quest when talking to Yoko.
  • Firestarter - Fixed an issue where some weapons could become job items after being retrieved from the locker.
  • Hi Ho Silver Lining - Fixed an issue where it wasn't possible to talk to Mr. Hands in the Heavy Hearts club because he wasn't interactable or did not spawn for players who experienced this issue on 2.1.
  • Just Another Story - Fixed an issue where Vehicle Contracts weren't spawning in some cases.
  • Things Done Changed - Fixed an issue where the screen could go black after calling the nurse for players who experienced this issue on 2.1.
  • Added an end credits message from Reed for endings other than The Tower.
  • Removed the possibility of installing attachments on the Catahoula Iconic pistol.
  • Fixed an issue where it was possible to activate the Sensory Protocol perk when it was on cooldown.
  • Fixed an issue where it was possible to activate Synaptic Accelerator cyberware during its cooldown.
  • It will now be required to have a cyberdeck installed to benefit from Cogito Lattice cyberware.
  • Fixed an issue where the buff after exploding an enemy with the Detonate Grenade quickhack didn't match the description.
UI
  • Added a Radioport category in Settings → Gameplay to customize Radioport behavior. Enable "Sync to Vehicle Radio" to keep the music playing after exiting a vehicle. With "Cycle Stations with Button Press", effortlessly switch between radio stations by simply pressing the Radioport button without the need to open the Radio menu. Enable "Save Current Station" to have the Radioport resume playing the radio station upon loading a saved game.
  • The data window that appears when scanning will no longer default to the "Hacking" tab rather than "Data". Instead, it will now remember which tab was open last.
  • Fixed an issue preventing players from changing cyberware at Ripperdocs and seeing the Cyberware Capacity bar.
  • Added a pop-up message for when it's not possible to activate Sandevistan during holocalls.
  • Like the non-Iconic variants, Iconic quickhacks will no longer have the duration displayed in their descriptions.
  • Made small improvements to the appearance of Net sites.
Visual
  • Neon-lit rims for the Yaiba Kusanagi CT-3X will now light up properly.
  • Fixed shadows appearing on V's torso when wearing tank tops.
  • Fixed dark shadows appearing on V's hands when holding some weapons with Ray Tracing enabled.
  • The Devil and Judgment tarot cards will now be properly displayed on the end-game reward screen.
Vehicles
  • Tire track marks will now match the actual contact patch of the tire.
  • Adjusted the suspension movement of some traffic vehicles to improve it visually.
  • Motorcycle suspension has been improved to reduce visual clipping into roads and curbs. Braking is also improved. Some vehicles, including cars and trucks, will now better handle landing from big jumps.
  • Brake Torque Vectoring has been added to the Drive Model simulation. This change effectively reduces understeer on vehicles that previously used to suffer from it excessively when hard braking while turning (most noticeable on FWD and rear/mid-engined vehicles).
  • Retuned or improved tuning in various vehicles. This includes: Mizutani Hozuki MH1, MH2 and “Hoseki”, Villefort Deleon V400, V410 Coupe and "Vindicator", Thorton Colby CST40, Mahir Supron FS3-T, Chevillon Centurion 1000, Quadra Type 66 “Hoon”, and more.
Implemented various small changes to improve drifting in most vehicles:
  • AWD vehicles now apply power through their front differentials more smoothly when exiting Burn Out Mode induced drifts (check out our Driving Manual in the Database for more info on those).
  • Dynamic Stability Management was adjusted to engage more smoothly after Burn Out Mode drifts.
  • Most mid-engined cars' Burn Out Mode implementation has been polished to induce more easily and overall feel better, including the Rayfield Caliburn, Quadra Turbo R, Herrera Riptide, etc.
PC-specific
  • Added a Hybrid CPU Utilization setting, which can be found under Gameplay → Performance. It can be set either to "Auto" (lets the operating system automatically decide how to distribute threads among the cores) or "Prioritize P-Cores" (prioritizes performance cores). It is set to "Auto" by default.
  • Implemented a fix that improves performance, especially on AMD RX Vega GPUs.
Misc
  • Added the CrystalCoat feature which allows you to change vehicle paint color. Because this technology was developed exclusively by Rayfield, it is currently only available for Rayfield vehicles you own.
  • Controller Inner Dead Zone has been changed to new default values for players who didn't change them, as keeping the old default values could result in stick drift.
  • Fixed an issue where the door in the Megabuilding H10 apartment wouldn't automatically close in some cases.
REDmod
  • Updated the address list for modders.
 
Top Bottom